


Rich, chocolatey, moist and spongey, this almond flour chocolate cake is bound to impress! You’ll never guess it’s paleo, grain free, or refined sugar free when you take your first bite.

If you know me, you’ll know I always, always choose vanilla cake over chocolate (especially vanilla funfetti). But ohmygosh I am in love with this almond flour chocolate cake!
It’s moist, fluffy, spongey and everything a chocolate cake should be but without any of the refined sugar, grains or oil you usually get. Just simple ingredients, fluffy layers and a rich paleo buttercream. It’s perfect. I am biased, I know, but it’s perfect!
Since you definitely don’t want to use almond flour in place of cake flour or all purpose flour in a recipe, you need to find a recipe that already uses almond flour as the base, like this one!
The almond flour adds a lot of natural moisture to the cake, but I promise it tastes just like any other chocolate cake, despite being grain free, paleo and refined sugar free!
Before we get into the nitty gritty, please make sure you are using almond flour from blanched almonds and NOT almond meal from whole ground almonds. They are different and will yield different results!
Almond flour is light and reacts well with the eggs and baking soda, giving this cake a beautiful rise and fluffy texture. Almond meal will prevent the cake from rising and can yield a very dense texture. Try my almond flour vanilla cake, flourless brownies or flourless chocolate cake next!
How to make almond flour chocolate cake
Line 3 round 8 inch cake pans with parchment paper and set aside.
It’s easiest to lightly grease the sides and bottoms, then cut out round pieces of parchment and place them in each pan so they stick easily.
You can also use 2 9 inch round pans, but see notes for adjustments in baking time etc.
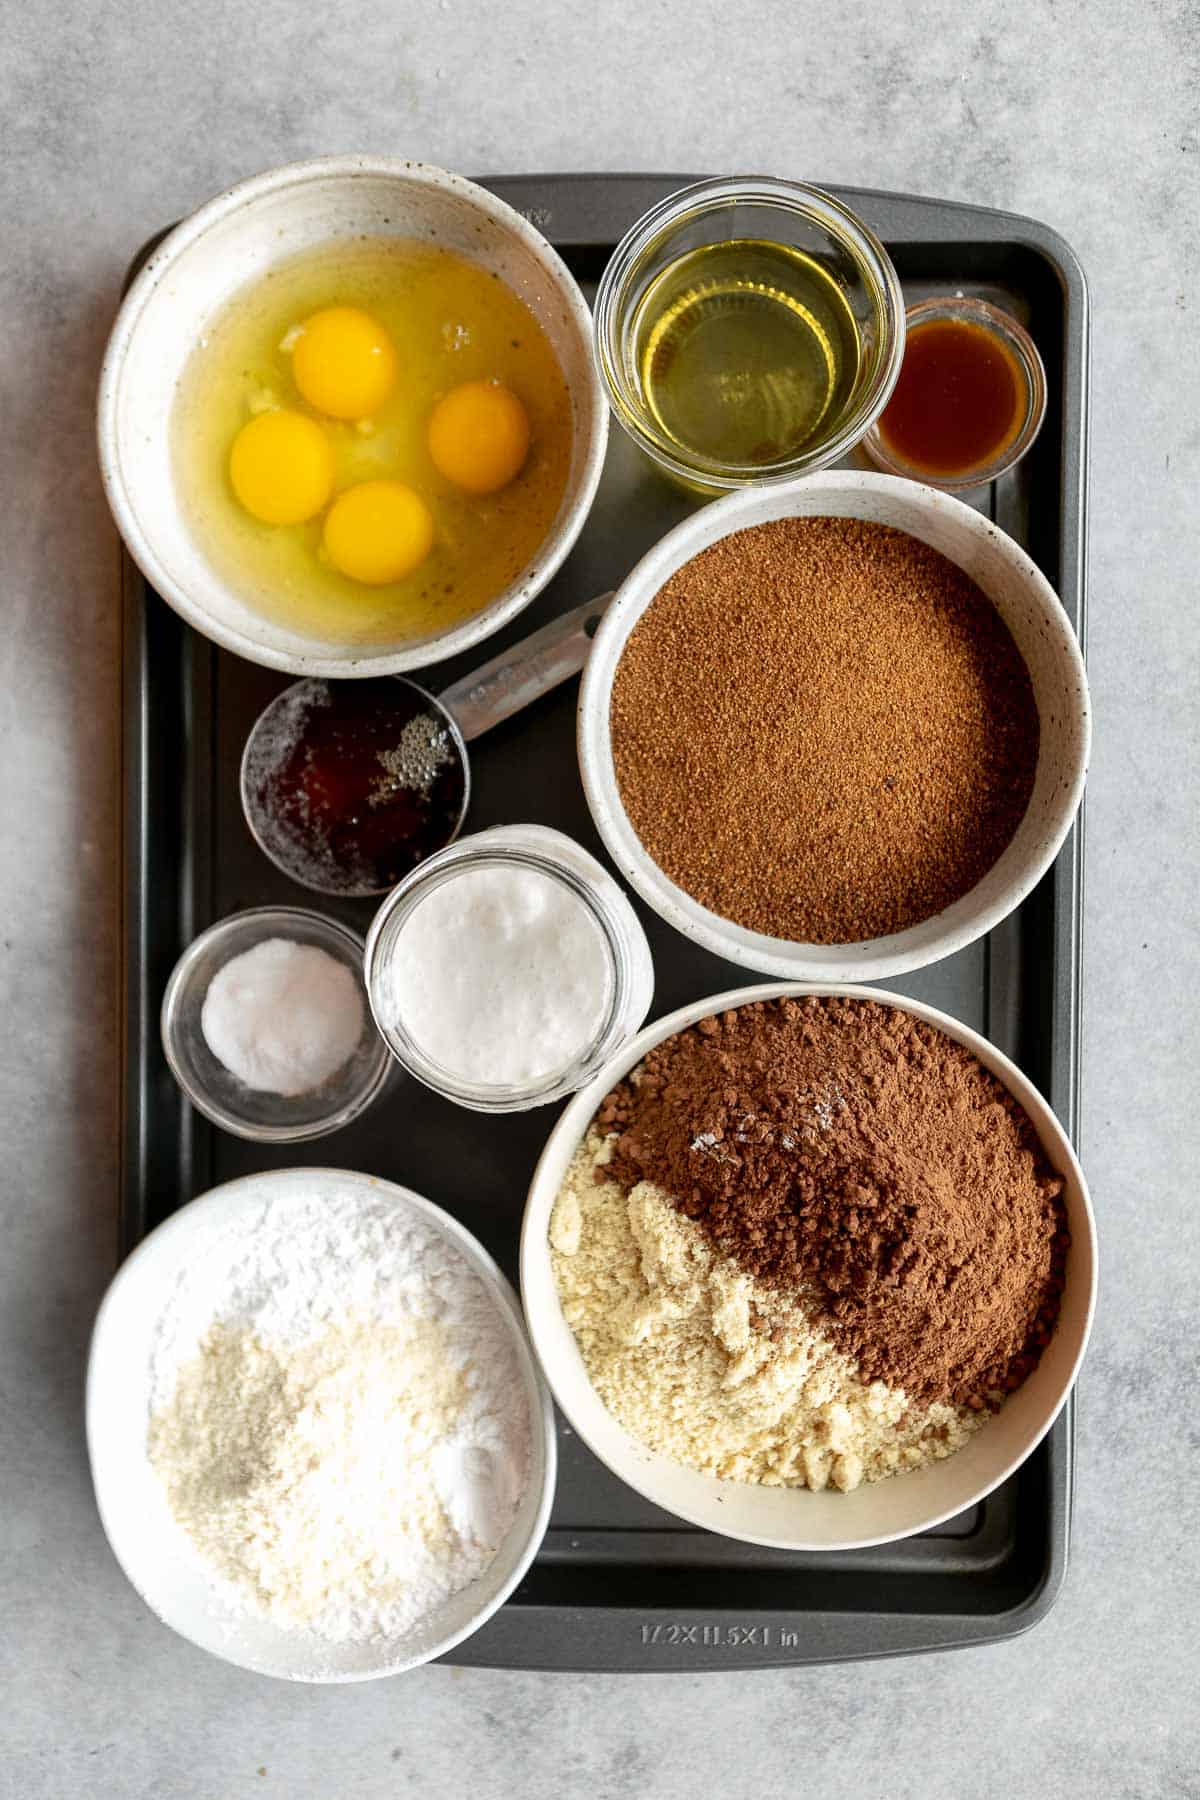
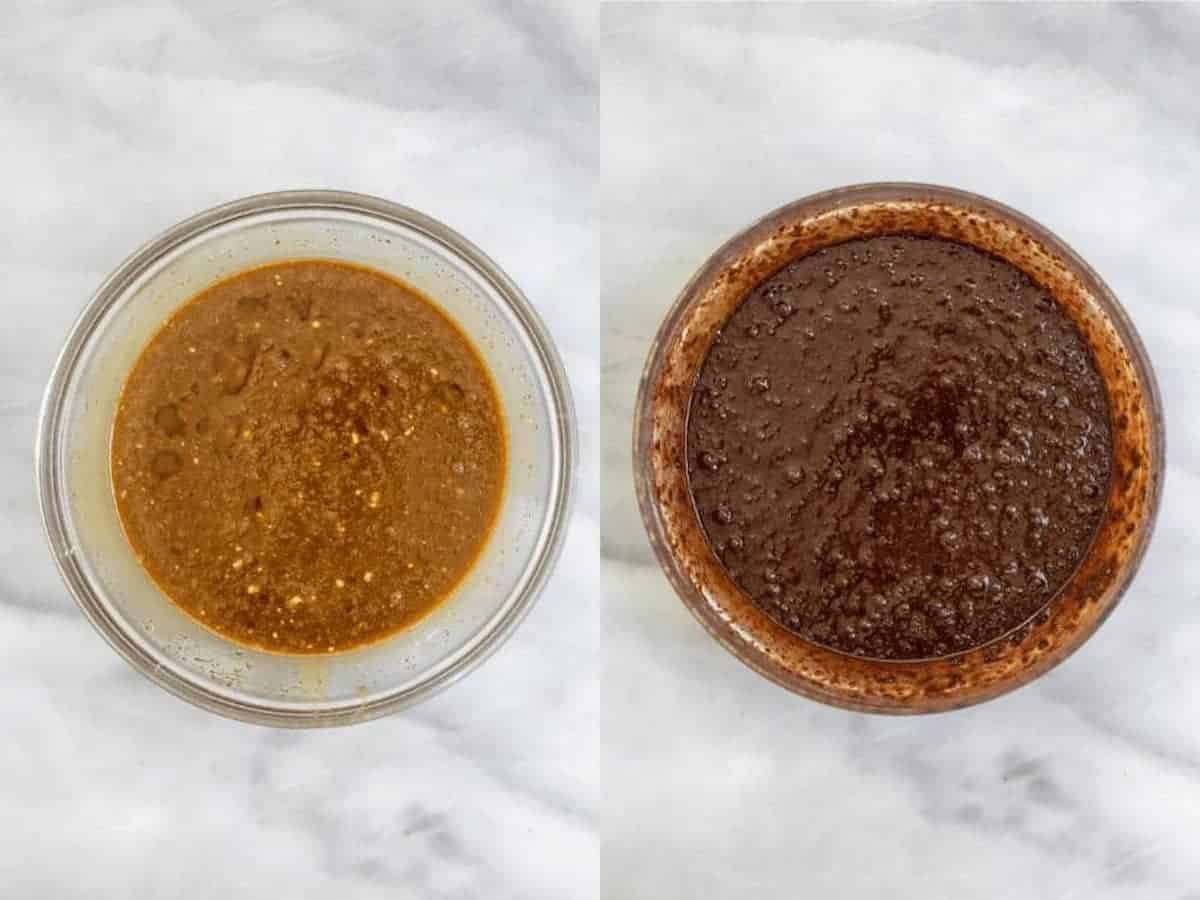
In a large mixing bowl, whisk together all wet ingredients. Be sure to shake the can of coconut milk before opening so that the creamy white part is well combined with the more watery part. You need 1 1/2 cups total, which is just shy of 1 can. Reserve the rest for the frosting!
In a second bowl, whisk together all dry ingredients. Be sure to spoon and level all flours, do not scoop right from the bag!
Combine the dry ingredients into the wet ingredients and whisk well until a batter forms.
Transfer to the prepared pans and fill each as evenly as possible. If you have a kitchen scale you can use it to get accurate measurements. Otherwise, just eyeball it!
Bake for 30-38 minutes. My oven was exactly 35 minutes, but all ovens are different. Check with a toothpick for doneness. If using 2 nine inch pans, bake time will be around 35-42 minutes, but check with a toothpick.
Once done, remove from the oven and let cool in the pans for about 15 minutes or until easy to handle.
Once cool enough, flip over onto a cooling rack, they should slide right out, but if not, just lightly tap the bottom.
Let cool completely before frosting. A little bit of internal heat will cause the frosting to melt, so be sure they are completely cool. You can stick them in the fridge if you need to speed things up.
While cooling, make the buttercream by beating together the palm shortening or butter with the coconut milk until creamy. Beat in the sifted sugar, sifted cocoa and all remaining ingredients until your desired consistency is reached. If it’s too thin, add more sugar, if it’s too thick add some regular non-dairy milk.
Once the cake is cool, frost between each layer and then frost the outside. Enjoy!

Key ingredients & swaps
ALMOND FLOUR. This cake of course has a base of almond flour! It will make it super moist and fluffy thanks to the high fat content and is naturally gluten free and paleo.
EGGS. You need four eggs for this recipe. Unfortunately, they are essential for both binding the ingredients as well as helping everything rise, so please don’t swap with a vegan egg replacer.
TAPIOCA FLOUR. The tapioca will help absorb some of the excess moisture and give this a more traditional cake texture.
COCONUT FLOUR. Coconut flour also helps absorb excess moisture. Because it is so absorbent and works differently than other flours, you cannot sub with more almond flour.
SWEETENER. We’ll use a mix of honey and coconut sugar to give this the perfect sweetness but keep it refined sugar free!
COCOA. Cocoa powder gives this cake a rich chocolate flavor. To enhance it, you can add in two teaspoons of espresso powder.
OIL. Oil adds moisture to this cake. I generally use refined avocado oil which has a neutral flavor, but any oil should work.
MILK. Full fat canned coconut milk will add to the richness of this cake. You can sub for light, but I do not recommend subbing with any other type of cartoned milk.

Pan Size Conversions
I made this cake into a 3 layer 8 inch round cake. However, you can definitely make this into a two layer 9 inch round cake.
With just two layers, you will want to omit one cup of batter so they bake properly and also extend the bake time by about 5-10 minutes because the layers will be thicker. If you aren’t feeling a whole cake, try my almond flour cupcakes instead!

How to store and freeze
Once prepared, this almond flour chocolate cake will store for about 3-5 days. Be sure to keep it covered so it does not dry out.
To help it keep fresh for longer, you can store it in the fridge, but I generally keep it at room temperature. Totally up to you depending on how quickly you think you’ll eat it!
If you want to prepare it in advance, you can bake the cake, let it cool completely, then wrap each layer tightly in plastic wrap and freeze until you’re ready to frost. Once it’s frosted, I recommend serving within 24 hours.

Tips to make it perfectly!
Use room temperature ingredients. Room temperature eggs will prevent the coconut milk from hardening in the batter. You can run your eggs until warm water if they’ve come straight out of the fridge. Otherwise, let them sit at room temperature for about an hour.
Spoon & level to measure the flour. You’re probably sick of me saying this if you come here often, but please do not scoop the flour right from the bag!
You will end up with too much flour accidentally. Spoon the flour into your dry measuring cups, then level off the top with a knife. Almond flour bakes differently than other flours, so measuring properly is very important.
Use regular cocoa powder, not dutch-processed. Regular cocoa powder is slightly acidic which reacts with the baking soda to create a nice fluffy texture. Dutch processed cocoa can result in a flat cake.
Can I use a different sweetener? This almond flour cake uses both coconut sugar and honey to help sweeten and moisten the sponge.
I do not recommend swapping the coconut sugar for a liquid sweetener, but you are welcome to swap it for another granulated sugar. Using too much liquid sweetener would result in a dense cake, which we don’t want! For best results, stick to the recipe as is!

More recipes you’ll love…
Lastly, if you want more recipes straight to your inbox, be sure to subscribe to my email list. As always, tag me on instagram if you make this recipe so I can see your creation!

Almond Flour Chocolate Cake
by: claire cary
Rich, chocolatey, moist and spongey, this almond flour cake is bound to impress! You’ll never guess it’s paleo, grain free, or refined sugar free when you take your first bite.
/ /
16
Instructions
-
Preheat the oven to 350 degrees Fahrenheit.
-
Line 3 round 8 inch cake pans with parchment paper and set aside.
-
It’s easiest to lightly grease the sides and bottoms, then cut out round pieces of parchment and place them in each pan so they stick easily. You can also use 2 9 inch round pans, but see notes for adjustments in baking time etc.
-
In a large mixing bowl, whisk together all wet ingredients. Be sure to shake the can of coconut milk before opening so that the creamy white part is well combined with the more watery part. You need 1 1/2 cups total, which is just shy of 1 can. Reserve the rest for the frosting!
-
In a second bowl, whisk together all dry ingredients. Be sure to spoon and level all flours, do not scoop right from the bag!
-
Combine the dry ingredients into the wet ingredients and whisk well until a batter forms.
-
Transfer to the prepared pans and fill each as evenly as possible. If you have a kitchen scale you can use it to get accurate measurements. Otherwise, just eyeball it!
-
Bake for 30-38 minutes. My oven was exactly 35 minutes, but all ovens are different. Check with a toothpick for doneness. If using 2 nine inch pans, bake time will be around 35-42 minutes, but check with a toothpick.
-
Once done, remove from the oven, and let cool in the pans for about 15 minutes or until easy to handle.
-
Once cool enough, flip over onto a cooling rack, they should slide right out, but if not, just lightly tap the bottom.
-
Let cool completely before frosting. A little bit of internal heat will cause the frosting to melt, so be sure they are completely cool. You can stick them in the fridge if you need to speed things up.
-
While cooling, make the buttercream by beating together the palm shortening or butter with the coconut milk until creamy.
-
Beat in the sifted sugar, sifted cocoa and all remaining ingredients until your desired consistency is reached. If it’s too thin, add more sugar, if it’s too thick add some regular non-dairy milk.
-
Once the cake is cool, frost between each layer and then frost the outside. Enjoy!
Notes
I have tested this recipe with both tapioca and arrowroot starch and it turns out well either way. Just be sure you don’t use cornstarch!
The canned coconut milk cannot be subbed for regular non-dairy milk from a carton. The fat from the canned version is really important for keeping this recipe moist!
Serving: 1slice / Calories: 333kcal / Carbohydrates: 37g / Protein: 8g / Fat: 21g / Saturated Fat: 5g / Fiber: 5g / Sugar: 19g