
– Advertisement –
Baked ham and cheese sliders are a timeless crowd-pleaser, perfect for parties, game days, or a casual family dinner. These sliders combine savory ham, melted cheese, and a buttery, flavorful topping, all sandwiched between soft, pillowy rolls. The beauty of this recipe lies in its simplicity, as well as its versatility—whether you prefer Swiss, cheddar, or even a combination of cheeses, the result is a delicious, melt-in-your-mouth bite.
– Advertisement –
Introduction
Sliders are small sandwiches that are ideal for serving in bulk without overwhelming guests. The combination of ham and cheese is a classic, and when baked with a buttery glaze, it creates a crispy, golden top while keeping the inside deliciously gooey and flavorful. These sliders can be served as appetizers at a party, packed in lunchboxes, or enjoyed as a quick weeknight dinner. With minimal preparation, these sliders are ready in less than 30 minutes, making them a go-to recipe for busy days.
– Advertisement –
Baked ham and cheese sliders are not only delicious but also highly customizable. From choosing the type of ham and cheese to experimenting with different types of bread and adding extra fillings, this recipe allows you to get creative while maintaining the essence of comfort food.
Step-by-Step Instructions
Now that you have all your ingredients, it’s time to assemble your baked ham and cheese sliders. Follow these simple steps for a delicious outcome.
– Advertisement –
Step 1: Preheat and Prepare the Baking Dish
- Preheat your oven to 350°F (175°C). This is the optimal temperature for ensuring that the rolls bake evenly, becoming golden on top while staying soft and gooey inside.
- Prepare a baking dish: Take a 9×13-inch baking dish and lightly grease it with cooking spray or butter. This will prevent the sliders from sticking to the dish as they bake.
Step 2: Prepare the Rolls
- Slice the rolls: Without separating the individual rolls, use a serrated knife to cut the entire pack of rolls in half horizontally, creating a top and bottom. You want the rolls to stay connected, as this helps the sliders stay intact during baking.
- Layer the bottom half: Place the bottom half of the rolls in the prepared baking dish, pressing them gently into place. This will serve as the base for your sliders.
Step 3: Add Ham and Cheese
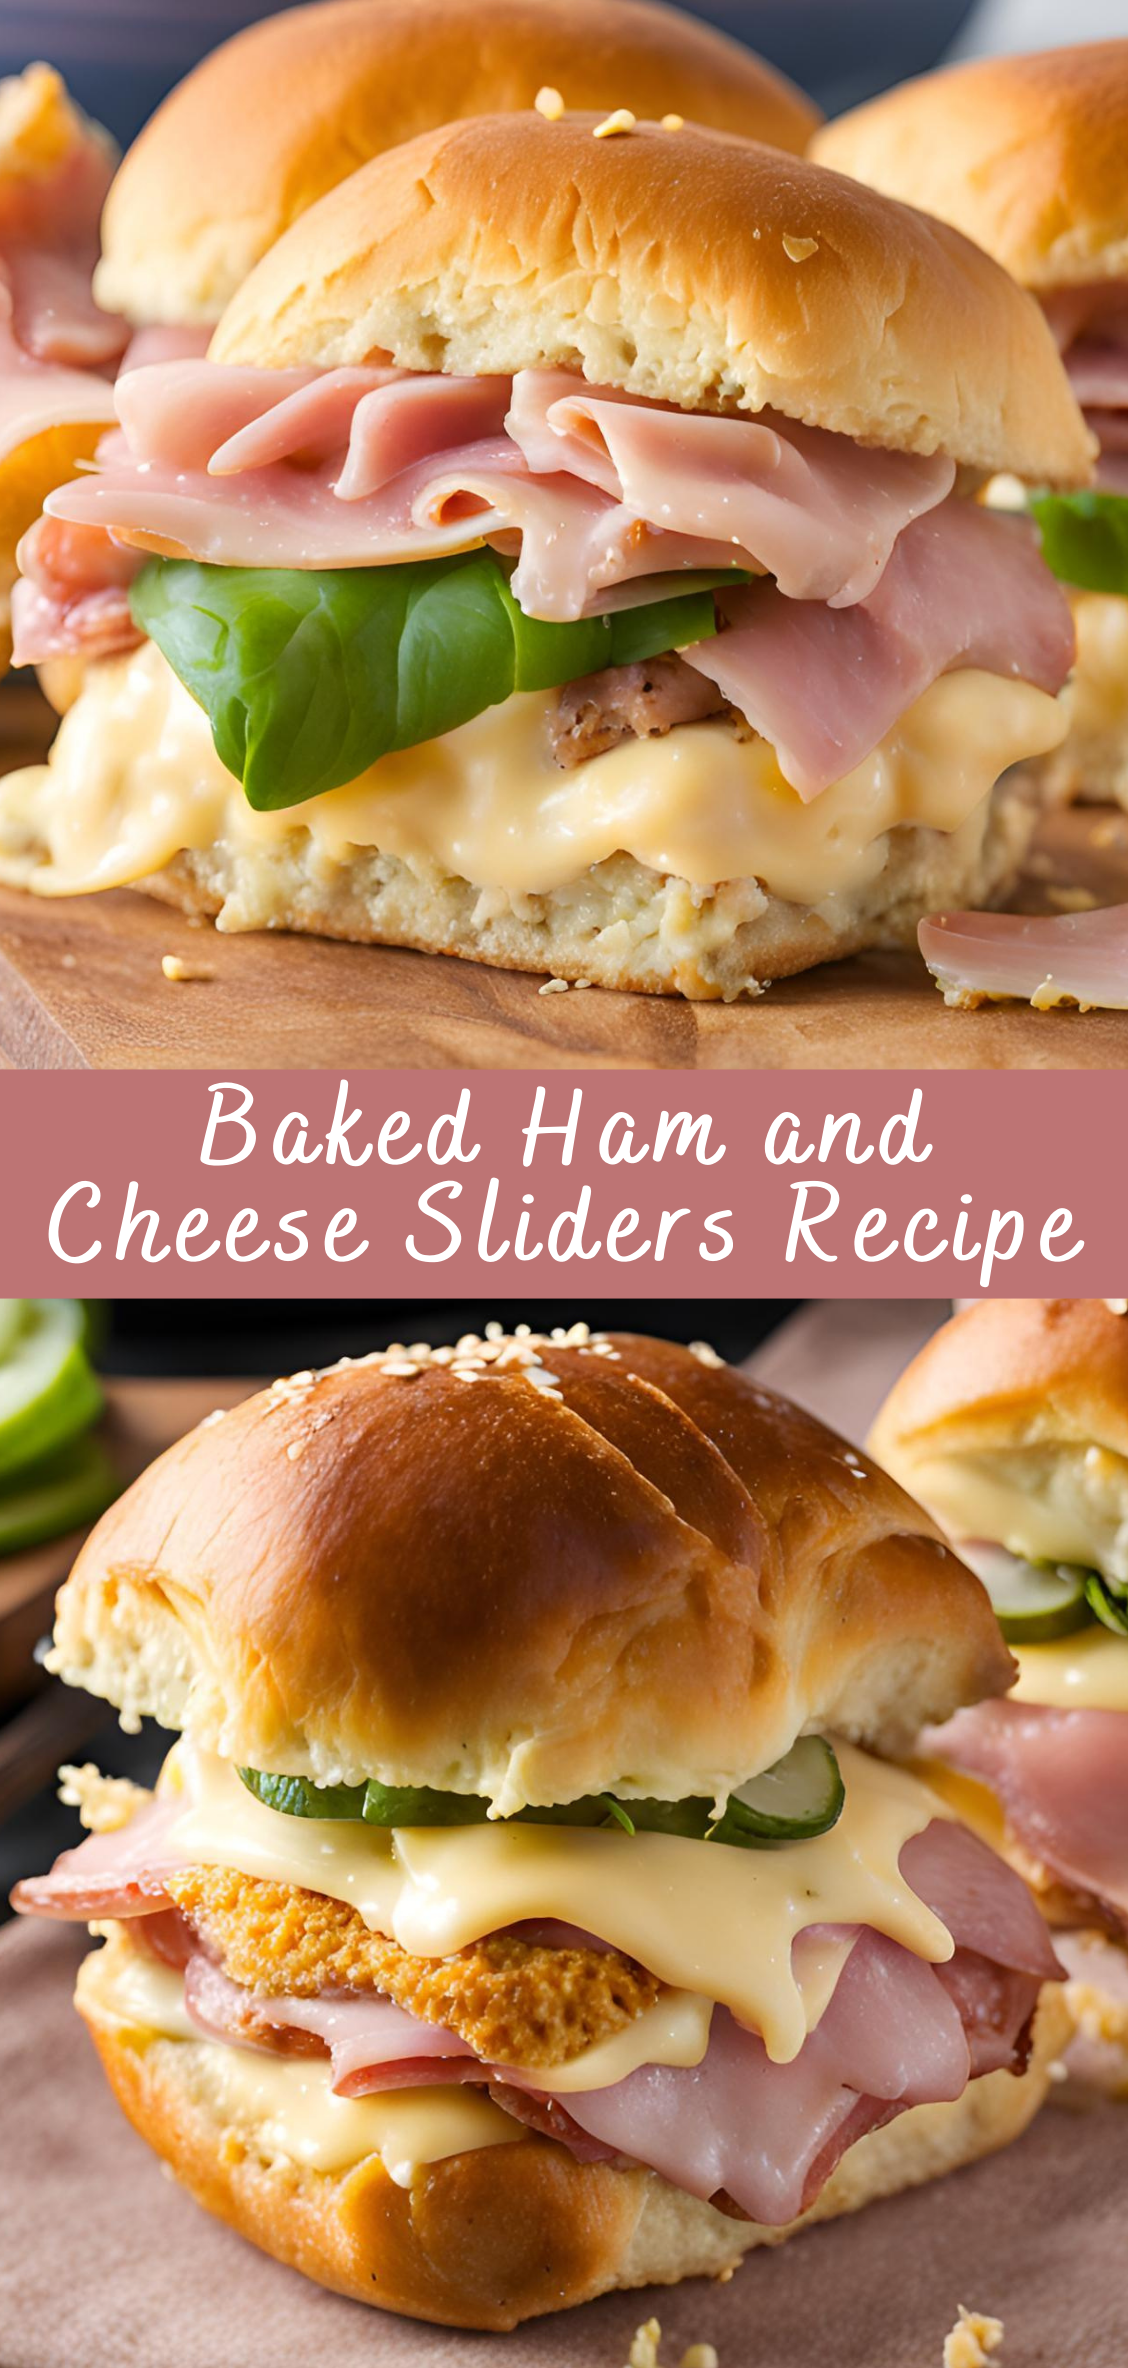
- Layer the ham: Take your ham slices and layer them evenly over the bottom half of the rolls. You can fold the ham slices if they are too large to fit the rolls. Ensure the ham is evenly spread for balanced flavor in every bite.
- Layer the cheese: Place one slice of cheese on each roll, covering the ham. If you are using multiple types of cheese, you can alternate the slices, or use a cheese that melts well for the best results.
Step 4: Assemble the Sliders
- Top with the remaining rolls: Place the top half of the dinner rolls onto the cheese, creating a sandwich. Gently press down to secure the sliders, ensuring everything is evenly distributed.
Step 5: Make the Butter Glaze
- Melt the butter: In a small saucepan or microwave-safe bowl, melt ½ cup of butter. If you’re using a microwave, heat in short intervals, stirring in between to avoid burning.
- Add the seasonings: Once the butter is melted, stir in the yellow mustard, garlic powder, onion powder, Worcestershire sauce, and poppy seeds (if using). Mix everything well to combine.
Step 6: Pour the Butter Glaze and Bake
- Pour the glaze: Pour the melted butter glaze evenly over the top of the sliders, ensuring that all the rolls are coated. The glaze will soak into the bread, giving it flavor and helping the tops crisp up in the oven.
- Cover with foil: Cover the baking dish with aluminum foil to keep the sliders moist during baking. This prevents the tops from becoming too dry while allowing the cheese to melt.
- Bake: Place the sliders in the preheated oven and bake for 15 minutes, covered. After 15 minutes, remove the foil and continue baking for an additional 5-10 minutes, or until the tops are golden brown and crispy.
Step 7: Serve and Enjoy
- Serve immediately: Once the sliders are done, remove them from the oven and let them rest for a few minutes before slicing along the lines of the rolls. This will help ensure that the sliders stay intact when served.
- Garnish (optional): If desired, garnish the sliders with extra poppy seeds or a drizzle of honey mustard or barbecue sauce on the side for dipping.
Flavor Enhancements and Variations
While this classic ham and cheese slider recipe is already packed with flavor, here are some fun variations to customize the dish based on your preferences:
1. Cheese Variations
- Cheddar: Sharp cheddar cheese adds a tangy flavor that contrasts nicely with the ham’s sweetness.
- Provolone: A slightly smoky cheese that melts well and has a mild flavor.
- Pepper Jack: For those who like a bit of spice, pepper jack cheese will bring an exciting heat to the sliders.
- Gouda or Gruyère: For a more sophisticated, nutty flavor, try swapping in Gouda or Gruyère cheese.
2. Meat Variations
- Turkey or Chicken: Swap the ham for thinly sliced turkey or rotisserie chicken for a leaner version of this dish.
- Bacon: Add crispy bacon between the layers of ham and cheese for an extra savory element.
- Smoked Sausage: Sliced smoked sausage can replace or complement the ham for a heartier, richer flavor.
3. Bread Variations
- Pretzel Buns: For a more rustic, slightly salty flavor, swap the soft dinner rolls for pretzel buns.
- Hawaiian Rolls: For a hint of sweetness, use Hawaiian rolls instead of regular dinner rolls.
- Whole Wheat Rolls: For a healthier version, choose whole wheat rolls, which provide more fiber and nutrients.
4. Add Veggies
- Caramelized Onions: Adding sweet, caramelized onions between the layers of ham and cheese will provide a rich, savory flavor.
- Pickles: Adding slices of dill pickles or sweet pickles between the layers will introduce a nice crunch and tanginess.
Prep Time
10 minutes
Cook Time
20 minutes
Total Time
30 minutes
Ingredients
- 12 dinner rolls (Hawaiian rolls or any soft white rolls)
- 1 lb (450g) sliced deli ham
- 12 slices Swiss cheese (or cheddar cheese)
- 1/4 cup butter, melted
- 1 tablespoon Dijon mustard (optional, for a little tang)
- 1 tablespoon brown sugar
- 1 tablespoon Worcestershire sauce
- 1 teaspoon onion powder
- 1/2 teaspoon garlic powder
- 1/2 teaspoon poppy seeds (optional, for topping)
- Salt and pepper, to taste
Instructions
- Preheat oven to 350°F (175°C) and grease a 9×13-inch baking dish.
- Prepare the rolls: Without separating the rolls, slice the entire pack of rolls in half horizontally, creating a top and bottom layer.
- Assemble sliders: Place the bottom half of the rolls in the prepared baking dish. Layer the ham slices evenly over the bottom half of the rolls, followed by the Swiss cheese. Top with the remaining half of the rolls to form sliders.
- Make the sauce: In a small bowl, whisk together melted butter, Dijon mustard (if using), brown sugar, Worcestershire sauce, onion powder, garlic powder, and a pinch of salt and pepper.
- Brush the sliders: Pour the butter sauce evenly over the top of the assembled sliders. Use a brush or spoon to spread it out. Sprinkle poppy seeds over the top, if desired.
- Bake: Cover the baking dish with foil and bake in the preheated oven for 15 minutes. After 15 minutes, remove the foil and bake for an additional 5-7 minutes, or until the tops of the sliders are golden brown and crispy.
- Serve: Let the sliders cool for a couple of minutes before slicing and serving. Enjoy these warm, cheesy, and savory sliders!
Notes
- Add-ins: You can add sliced pickles or mustard inside the sliders for extra flavor. If you prefer other types of cheese, cheddar, provolone, or mozzarella work great as well.
- Make ahead: You can assemble the sliders a day ahead, then cover and refrigerate them. When ready, just bake them as directed.
- Leftovers: If you have any leftovers, store them in the fridge and reheat in the oven or microwave.
– Advertisement –